


—
Table of Contents
- Understanding the Art and Science of Lash Mapping
- Essential Tools for Precise Mapping
- Analyzing Eye Shapes and Facial Symmetry
- Primary Lash Mapping Styles and Their Effects
- Advanced Layering Techniques for Texture and Depth
- Customizing Lengths and Curls for Structural Support
- Common Mapping Mistakes and How to Avoid Them
- Elevating Your Professional Craft through Continuous Learning
Understanding the Art and Science of Lash Mapping
Lash mapping is the foundational blueprint of every successful eyelash extension set. It is the process of planning which lengths, thicknesses, and curls will be applied to specific sections of the natural lash line to achieve a desired aesthetic result. Without a map, a technician is essentially working in the dark, which often leads to asymmetrical results or sets that do not flatter the clients unique facial features.
Every face is a unique canvas. The distance between the eyes, the prominence of the brow bone, and the natural direction of lash growth all dictate how a set will look once completed. By mastering the ultimate guide to lash mapping: creating the perfect custom look for every client, a lash artist transitions from a basic service provider to a true designer. This level of customization is what separates high end boutiques from discount salons.
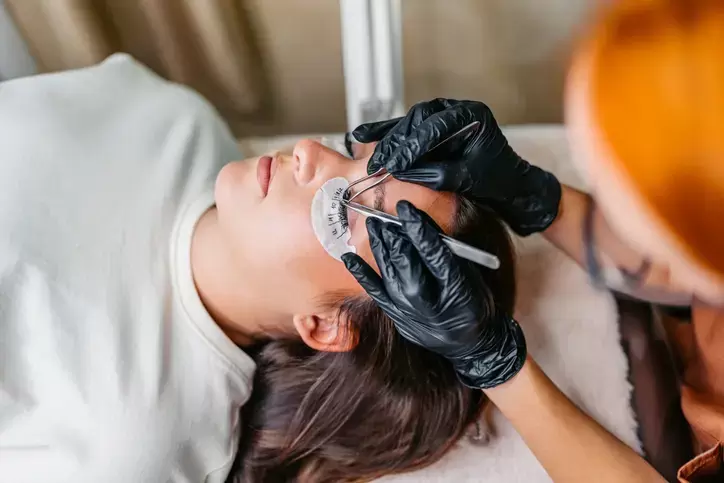
When you begin a session, the map is drawn directly onto the under eye gel pads using a specialized pen. This serves as a constant reference point throughout the application process. It ensures that both eyes are perfectly symmetrical and that the transitions between different lengths are seamless. A well executed map accounts for the health of the natural lashes, ensuring that longer extensions are only placed where the natural hair is strong enough to support the weight.
Essential Tools for Precise Mapping
To create a flawless map, you need the right instruments. Precision is the hallmark of a professional lash artist. While some experienced technicians claim to map by eye, the most consistent results always come from physical marking.
- High Quality Eye Pads: These provide the white background necessary to see the natural lashes clearly and offer a surface for your map.
- Fine Tip Mapping Pens: Use a smudge proof, non toxic pen. Red or green ink can sometimes be more visible against dark natural lashes than standard black ink.
- Lash Ruler or Calipers: These tools help measure the natural lash length, ensuring the extensions do not exceed the safe limit of two millimeters longer than the natural hair.
- Client Intake Forms: These should include notes on previous styles the client has worn and any sensitivities they might have.
Using these tools correctly allows you to implement the techniques taught at Training Beauty & Beyond, where precision and safety are prioritized above all else. Having a standardized kit ensures that every map you draw is clean, legible, and accurate to the millimeter.
Analyzing Eye Shapes and Facial Symmetry
Before picking up a pair of tweezers, you must conduct a thorough visual analysis. The goal of lash mapping is often to create an illusion of balance. For example, if a client has wide set eyes, the map should focus on adding density and length toward the inner corners to pull the eyes together visually. Conversely, for close set eyes, the focus shifts to the outer corners to create a widening effect.
Identifying Eye Planes
The horizontal plane of the eye tells you if the eyes are upturned, downturned, or neutral. For a downturned eye, a cat eye map can be disastrous as it emphasizes the downward slope. Instead, a doll eye or a reverse cat eye might be used to lift the outer corner.
Assessing the Brow Bone and Eyelid Space
Deep set eyes often have a prominent brow bone that can cause long, curly lashes to hit the skin, causing discomfort and premature shedding. In these cases, using flatter curls like B or C curls in longer lengths, or shorter lengths with more dramatic curls, can prevent this interference. Training Beauty & Beyond emphasizes the importance of this pre application assessment to ensure long term client satisfaction and lash health.
Primary Lash Mapping Styles and Their Effects
There are several standard maps that serve as the starting point for most custom designs. Understanding these basic shapes allows you to mix and modify them for a truly bespoke result.
- The Doll Eye Map: This style places the longest lengths in the center of the eye, directly above the iris. It creates an open, rounded, and youthful appearance. It is ideal for clients with almond or wide set eyes.
- The Cat Eye Map: Length increases gradually toward the outer corners. This creates a winged, sultry look that elongates the eye. It is perfect for close set or round eyes but should be avoided for downturned eyes.
- The Squirrel Map: This is a sophisticated variation where the longest lashes are placed under the arch of the eyebrow, usually at the outer third of the eye before tapering down slightly at the very end. This follows the natural brow bone and is universally flattering.
- The Kim K or Spiky Look: This involves using spikes or closed fans that are two to three millimeters longer than the base layer. This creates a textured, wispy appearance that mimics the look of strip lashes.
Advanced Layering Techniques for Texture and Depth
A common mistake among novice artists is treating the lash line as a single row. In reality, natural lashes grow in three to five distinct layers. Mapping across these layers is what creates a professional, voluminous finish.
To achieve a perfect top line, you must adjust the lengths based on the layer you are working on. For the bottom layer, which is closest to the eye, you use the longest lengths. For the middle layer, you subtract one millimeter. For the top layer, you subtract another millimeter. This creates a uniform edge.
If you prefer a textured, voluminous look, you can keep the lengths the same across all layers. This will result in a fluffier, more staggered appearance. Mastering these nuances is a key component of the curriculum at Training Beauty & Beyond, where students learn how to manipulate layers to achieve specific stylistic outcomes.
Customizing Lengths and Curls for Structural Support
The health of the natural lash must always come first. A beautiful map is useless if it causes traction alopecia or discomfort. When mapping, take note of the inner and outer corners, where natural lashes are typically finer and shorter. These areas should always be mapped with shorter, lighter extensions to prevent drooping.
Choosing the Right Curl
- J and B Curls: These offer a natural lift and are great for clients with straight lashes who want a subtle enhancement.
- C and CC Curls: These are the most popular curls, providing a visible lift that opens the eye without being too dramatic.
- D and DD Curls: These are high impact curls. They are excellent for clients with downward pointing lashes as they provide a significant lift.
- L and M Curls: These have a flat base and a sharp upward angle, making them perfect for hooded eyes or clients with very straight lashes that struggle to hold a curl.
By integrating these curls into your map, you can correct the natural growth direction. If a client has lashes that cross over each other, your mapping and direction of placement can help straighten the overall appearance of the set.
Common Mapping Mistakes and How to Avoid Them
Even experienced artists can fall into traps that result in a less than perfect set. One frequent error is failing to account for the bridge of the nose. If the inner corner extensions are too long, they will look unnatural and may irritate the client when they blink. Always taper down to five or six millimeter lengths in the very inner corners.
Another common issue is lack of symmetry. It is easy to get caught up in the details of one eye and forget to check it against the other. Periodically sit the client up during the process or use a lash mirror to check the balance from the front. Detailed training from institutions like Training Beauty & Beyond helps artists develop the muscle memory and visual discipline to avoid these pitfalls.
Finally, avoid using the same map for every client. While a cat eye might be your favorite style to create, it is not a one size fits all solution. Developing the ability to pivot your plan based on the clients unique anatomy is the mark of a master technician.
Refining Your Vision and Execution
The process of lash mapping is as much about communication as it is about technical skill. Before you draw your first line, have a thorough consultation. Ask the client if they wear glasses, as very long extensions may hit the lenses. Ask about their daily makeup routine; those who wear heavy eyeliner may need a denser, more dramatic set to ensure the extensions are visible.
As you progress in your career, you will find that your maps become more complex. You might start mixing different curls within a single set to create a customized lift, or using different diameters of lashes to build depth. This level of detail is what creates a signature style that clients will recognize and seek out.
Continuous education is vital in this rapidly evolving industry. New lash fibers, adhesives, and mapping trends emerge constantly. Engaging with advanced workshops and specialized programs at Training Beauty & Beyond ensures that your skills remain sharp and your techniques are up to date with the latest global standards. By dedicating yourself to the craft of mapping, you ensure that every client leaves your chair feeling like the best version of themselves, with a bespoke look designed specifically for their eyes.
—

