


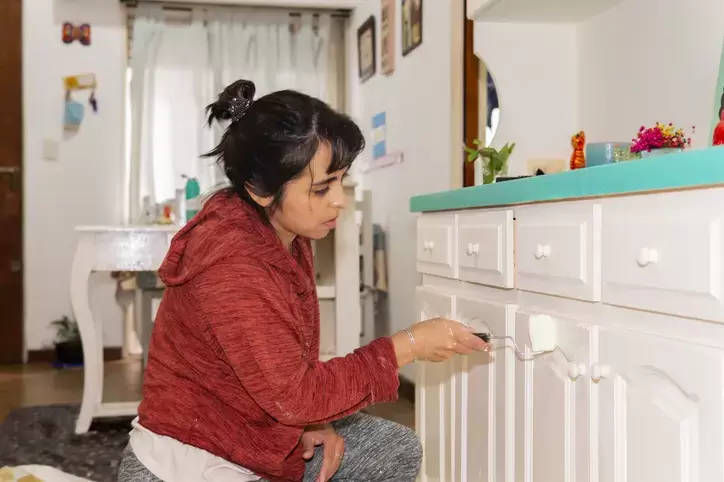
—
Why Painting a Vanity Is a Game-Changer
Tired of staring at that outdated vanity while brushing your teeth? You’re not alone. Bathrooms are often the most neglected rooms when it comes to design, yet they’re where we start and end each day. So, what if I told you that a can of paint and a few simple tools could completely transform the look and feel of your space?
Whether you’re working with a sleek white oak vanity or a builder-grade particle board cabinet, painting your bathroom vanity is a cost-effective, stylish upgrade that can make your whole bathroom feel brand new. It’s the perfect DIY project — manageable over a weekend, budget-friendly, and deeply satisfying.
But don’t grab your paintbrush just yet. There’s a right way to do this, and it makes all the difference between a Pinterest-worthy makeover and a flaky, uneven mess. Ready to dive in? Let’s get our hands a little dirty.
Step 1: Evaluate and Plan Before You Paint
You wouldn’t just slap paint on a cake, right? Same goes for your vanity. Preparation is where the magic begins.
First, Check What You’re Working With
Ask yourself a few questions:
- Is your vanity made of solid wood, veneer, MDF, or laminate?
- Are there existing layers of paint or varnish?
- Any signs of damage like water stains, mildew, or warping?
Why does this matter? Because different materials require different prep. A solid white oak vanity, for example, holds paint beautifully if properly sanded, while laminate might need a bonding primer to avoid peeling.
Gather Your Supplies (Don’t Skimp Here)
Here’s your no-nonsense supply list:
- Screwdriver (for removing hardware)
- Painter’s tape
- Drop cloths
- Degreaser or TSP cleaner
- Sandpaper (80-, 120-, and 220-grit)
- Primer (bonding or stain-blocking depending on material)
- Paint (alkyd enamel, chalk paint, or cabinet paint)
- Topcoat (optional but recommended)
- Angled brush and foam roller
Color Me Curious: Choosing the Right Shade
If you’re repainting a white oak vanity, think twice before going stark white. White on white? Not the most inspiring. Navy blue, forest green, or even a moody charcoal can create contrast and drama. Want something trendy? Greige (gray-beige) is your best friend.
Pro Tip: Sample a few paint colors directly on the vanity to see how they look in your bathroom’s natural and artificial lighting.
Step 2: The Art of Disassembly (Trust Me, It’s Worth It)
Tempted to paint everything in place? Please don’t.
Take the time to:
- Remove all drawers, cabinet doors, and hardware.
- Label each piece (masking tape and a Sharpie work wonders).
- Store screws and hinges in zip-lock bags. Future you will thank you.
This gives you clean edges and ensures paint won’t gunk up your hardware or drip into hinges. A smooth, professional finish is all in the prep — not just the brushwork.
Step 3: Deep Cleaning – The Step Everyone Skips (But Shouldn’t)
You may not see the grime, but trust me — it’s there.
Use a degreaser or TSP cleaner to wipe down every inch of the vanity, especially around handles and under the sink. Bathroom furniture often accumulates unseen buildup from lotion, hair spray, and hand soap. Skipping this step is the number one cause of paint not adhering properly.
Bonus Tip: After cleaning, rinse with warm water and let it dry completely. Moisture and paint are not a happy couple.
Step 4: Sanding – Yes, Even That “Paint-Ready” Surface
Sanding may sound like a chore, but it’s essential. The goal isn’t to strip it down to bare wood — just to scuff the surface so the primer sticks.
Here’s the order:
- Start with 80-grit if the surface is glossy or previously painted.
- Smooth it out with 120-grit.
- Finish with 220-grit for a silky touch.
For a white oak vanity, sanding will also help bring out the natural grain if you’re doing a semi-transparent finish instead of full paint.
Pro Move: Always sand in the direction of the wood grain. Circular motions might seem quicker, but they can cause visible scratches.
Step 5: Priming – The Invisible Armor
Skipping primer is like baking a cake without greasing the pan. You can try it, but don’t complain when it all sticks.
Use:
- Bonding primer for slick surfaces like laminate or MDF.
- Stain-blocking primer for raw wood or old paint jobs prone to bleed-through.
Apply with a brush in corners and a foam roller for flat areas. Thin, even coats are better than thick globs. Let it dry as per the label — no shortcuts!
Step 6: Painting Like a Pro – Tools, Techniques, and Timing
Ready for the fun part? Here’s how to paint your bathroom vanity like a pro.
Choosing the Right Paint
- Alkyd enamel: Durable and self-leveling — great for high-moisture areas.
- Cabinet paint: Designed specifically for durability and chip resistance.
- Chalk paint: Great for a matte, farmhouse-style finish (but needs sealing).
If you’re going bold with a color or keeping the light charm of your white oak vanity, make sure to use high-quality paint. Cheaper options often yellow over time or chip easily in humid bathrooms.
Application Techniques
- Start with an angled brush for corners and crevices.
- Use a foam roller for drawer fronts and large flat surfaces.
- Always paint in thin coats — 2 to 3 is usually ideal.
- Lightly sand with 220-grit between coats for a smooth-as-butter finish.
Let each coat dry fully. Yes, waiting is boring. But rushing leads to tacky paint and frustration.
Step 7: Seal the Deal (Optional, but Highly Recommended)
Once your vanity is painted and dried, it’s time to seal the deal — literally.
Use a water-based polyurethane or cabinet topcoat to protect your masterpiece from nicks, scratches, and humidity. Go for matte, satin, or semi-gloss based on your style. Avoid high-gloss unless you’re going for that 80s diner vibe.
Apply the topcoat the same way as your paint: brush for corners, roller for panels. One to two coats should be enough.
Step 8: Reassemble and Admire Your Work
Give everything at least 24–48 hours to cure before reassembling. Then:
- Reattach doors and drawers.
- Install new hardware if you’re going for a total refresh.
- Add drawer liners or organizers to keep things pristine.
Don’t forget to stand back and admire your handiwork. You’ve just pulled off a bathroom vanity makeover that adds real value and charm to your home.
Design Tips to Elevate Your Painted Vanity
Want to take things a step further? Here are a few extra touches:
- Swap the faucet: A matte black or brushed gold faucet adds instant modern appeal.
- Add under-vanity lighting: LED strip lights underneath can give it a high-end, floating effect.
- Replace the mirror or add a frame: Helps tie in your new vanity color with the rest of the bathroom.
- Style it up: Add a small plant, a soap dispenser in a matching finish, or a stack of rolled hand towels.
Remember, even the simplest updates can create a spa-like vibe.
Conclusion: You’re Not Just Painting — You’re Transforming
When done right, painting your bathroom vanity is more than a weekend project — it’s a design statement. Whether you’re revamping a white oak vanity or giving life to a tired old cabinet, you’re taking ownership of your space, infusing it with your style, and saving a chunk of change in the process.
It’s about more than just paint. It’s about seeing potential where others see “blah,” and turning a basic fixture into something personal, beautiful, and long-lasting.
So the next time you catch yourself frowning at that boring bathroom cabinet, grab a brush and turn it into a feature worth showing off. You’ve got this.
—

