


—
I spent three hours with a vacuum hose last month, and the dog hair was winning. Every pass pulled up a fresh layer from a place my hand vacuum had never reached, and my backseat started to smell like wet animal when the sun hit the windows. That is the moment most people finally notice what months of casual rides have done to their car.
Here is the plan: in the next few minutes, you’ll learn which damage actually matters, the fastest sequence for getting a car clean, and how to stop the cycle from starting again next week. It is not really about hair.
What dog hair does to a car interior over time
Fresh pet hair looks harmless. Give it a season of warm afternoons and a car that sits in a parking lot, though, and it starts working into your seats in ways you won’t fix with a lint roller.
The problem is that hair isn’t just sitting on the surface. It’s migrating. Short, stiff hairs from dogs like labs and shepherds push deep into the nap of fabric upholstery, then settle into the padding beneath it. Over months of driving, that buildup traps moisture, and moisture is what actually changes the smell of a car. The hair itself isn’t the source of the odor. The hair collecting dust, skin cells, and dander is.
Grit works the same way. A dog that hops into the car after a park visit tracks sand and dirt into the seams, and every time you sit down, you grind it further into the fabric. This is why front seats where the dog rides on your lap look noticeably worse than the back seat after two years of the same dog.
The other quiet damage is moisture, and it doesn’t come from the hair. It comes from a dog that has been swimming or walked in rain and settles into one spot in the back. That dampness sits against the seat cushion, and in a fabric seat, it can leave a smell that doesn’t come out with simple washing. Leather and vinyl have their own problem: claws. A seventy-pound dog shifting its weight on a turn scuffs the surface layer, and those scratches show up fast.
Why a quick vacuum never really fixes it
Most people own a vacuum and not much else. That works for crumbs, but a standard vacuum nozzle skims the surface of a car seat. It cannot reach the layer where embedded hair lives.
You need friction and lift more than suction. A rubber pet hair brush, the kind with short nubbed teeth, digs hair up out of upholstery in a way a brush attachment won’t. Firm pressure matters more than speed. Work in small squares, and you’ll see the difference in about a minute.
The sequence matters too. If you vacuum first, you’re chasing your tail. The order that actually works is: pull everything out, brush the seats free of loose hair, vacuum, treat spots, then let everything dry fully before anyone sits down. Skipping the dry time is one of the most common reasons a cleaned car starts to smell again within a week.
Heat is a useful tool here. A surprising amount of what looks like filth comes up with warm water and a soft cloth before you bring in any product. Save the cleaners for stains the water didn’t touch.
Sorting the damage into three tiers
Not every problem deserves the same amount of effort. I’ve found it useful to sort interior condition into tiers, because that tells you what to do this weekend and what to leave alone.
- Tier one, surface: loose hair, crumbs, dust in the crevices. Quick work. Twenty minutes.
- Tier two, embedded: hair packed into the seat nap, set-in stains, a lingering smell. Half a day, or a professional detail if you’d rather not.
- Tier three, structural: torn seams, collapsed foam, cracked leather, or a smell that returns after two cleanings. This is replacement territory.
Most people correctly identify tier one and wrongly assume tier three is just stubborn tier two. If you’ve cleaned a seat twice and the smell returns, you’re not failing at cleaning. You’re dealing with a moisture problem underneath the fabric, and no amount of surface treatment will solve it.
Stopping the cycle before it starts
Cleaning a car is fine. Never needing to deep clean it is better.
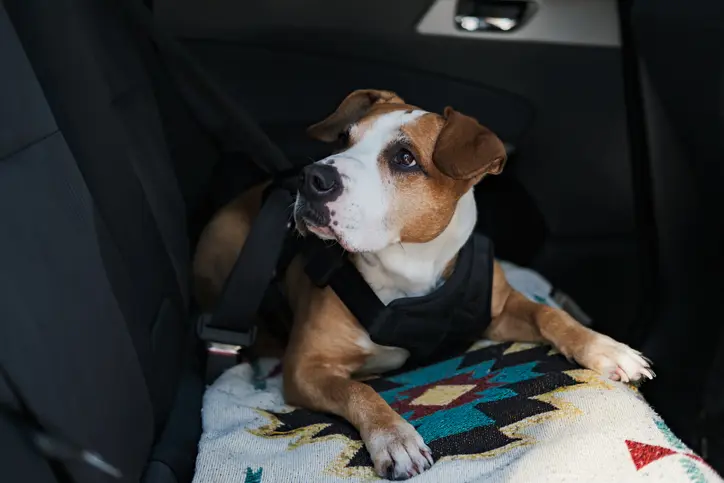
The single best thing you can do is create a physical barrier between the dog and the seat. A fitted back seat car cover for dogs keeps hair and moisture off the upholstery in the first place, which means your regular upkeep drops from a deep clean to a shake and a wipe. Look for one with a waterproof backing if your dog swims, side flaps if your dog leans against the door, and a surface you can wipe down rather than one that needs washing.
Second, deal with the dog before the car. A quick towel dry and a brush off after a walk removes most of what would otherwise end up against the seat. It takes sixty seconds and it is the highest return habit in this whole routine.
Third, keep one tool where you park. A rubber brush or a reusable lint roller in the trunk means you deal with dog hair the same day instead of waiting for it to set. Dogs are passengers in millions of American households, and the American Automobile Association offers guidance for traveling safely with pets, including keeping dogs secured rather than loose, which also happens to protect your seat from a shifting, scratching animal.
And if your dog has never been comfortable in the car, that’s a separate project. Vets and animal behavior resources like PetMD recommend starting with short trips and building up, since a relaxed dog is also a dog that doesn’t scramble across the seat with muddy feet.
A quick weekend routine that holds up
If you want a system rather than a one-time effort, try this. I’d rate it in the order that matters most.
- Shake out or wipe down your seat cover every week. Two minutes.
- Brush and towel the dog after any wet or dusty outing. One minute.
- Brush the seats, then vacuum, once a month with no cleaner unless there’s a visible stain.
- Deep clean twice a year, or after any accident, spill, or muddy ride.
- Check the seams and foam every six months. Fabric wears through at the stitching first, and catching it early saves the cushion.
That’s a four to five hour commitment a year if you keep up with the weekly step. Ignore it for a year and you’ll spend a full weekend trying to reverse damage that mostly didn’t need to happen.
When to replace instead of clean
Cleaning has a ceiling, and it’s lower than most people think. If the foam under a seat has picked up moisture repeatedly, replacing the cover or the seat cover underneath is often cheaper than a professional restoration. The same is broadly true across car interiors. Consumer Reports has noted that interior condition and occupant protection both factor into how a car holds its value, so a seat that’s degraded from years of wet dogs and grit is worth addressing before resale, not after.
If you’re deciding, look at the fabric itself. Stains that lift after one treatment mean clean. A smell that disappears and comes back after rain means moisture got into the foam. Seams splitting apart or tears at a seat edge mean replacement.
My honest take: replacement sounds like the expensive option until you add up three professional details over a year and the resale hit on a stained backseat. If you drive with a dog daily, a quality cover and a consistent weekly wipe will cost less than the cleaning you’d otherwise pay for, and it will keep the actual seat intact for the life of the car.
So, when did you last pull your back seat cover out and look at what’s underneath it? Do it this weekend, while the sun’s still out and your dog thinks it’s getting a ride.
—

